Have you ever followed a brand on Instagram and admired their beautifully-curated grid? Their images were cohesive and they included perfectly on-brand custom quotes that uniquely showcased their brand?
You may have even tried to create your own simple quote templates, but failed to create something unique, something that stood out from the rest of Instagram branded quotes.
Creating your own quote template doesn’t have to be frustrating, though! Here is a simple, step-by-step breakdown on how to create a simple but unique Instagram quote template in Photoshop!
The Pros of Photoshop for Instagram
There are a million ways and apps to make your own templates for Instagram quotes, yes. But, if you want to incorporate your own fonts and images and testimonials and quotes into your feed to share a consistent visual brand identity, Photoshop is the quickest way to do so.
You can create ONE layered file, simply change what you need at any given time, and then save out separate flattened files to pop into your feed as you wish!
Today I'm going to show you one of the easiest ways to make your custom template.
But first, remember. Do not be intimidated by Photoshop!
Note: All directions shown below are in Adobe Photoshop CC 2017.
Need to get Photoshop? Click here to get the details from my previous post.
Your Step-by-Step Breakdown for Creating Instagram Quote Templates
1. Create a new document: Click on File > New
2. Set Preset Details:
Width: 1200 pixels
Height: 1200 pixels
Resolution: 100 Pixels/Inch
Color Mode: RGB
Background Contents: White
3. Set your background. Remember, what you always see is top to bottom & front to back. Double-click the ‘Background’ layer with the lock next to it. Name your layer and adjust to these settings:
Color: None
Mode: Normal
Opacity: 100%
4. Create new layers: Click on Layer > New Layer. Then, name this layer. Be sure the settings are adjusted to those below.
Color: None
Mode: Normal
Opacity: 100%
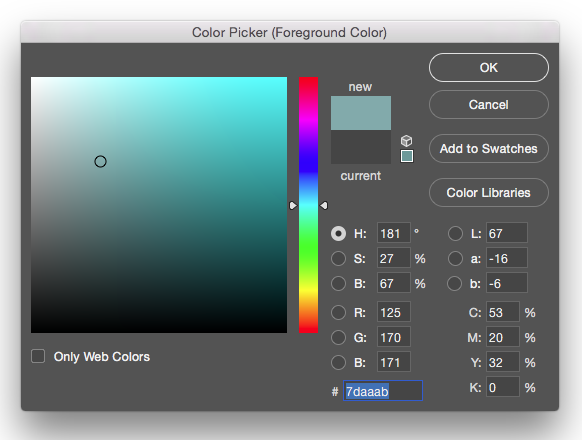
5. Next, click the Set Foreground Color box to get the colors to pop up. Choose a color from your brand identity color palette. Click OK.
6. Use the paint bucket tool to set your colors. Click on the Paint Bucket Tool in the tools on the left.
7. With your New Background Layer selected, click in the middle of your document to place in the color. You can use a solid color, insert a photo or even use text.
8. Be sure to SAVE often! Click File > Save, and save the original file as a .psd file.
9. To add your wording, now use the text tool. Click on the Horizontal Type Tool in the tools on the left. Click in the middle of your document where you want the words to go. It automatically creates a new Type Layer!
10. Click the Set Foreground Color box again to get the colors to pop up. Choose a color from your brand identity color palette (or black or white!). Click OK.
11. Begin typing your words. Select your text and adjust the font, style, size, paragraph orientation, etc in the toolbar along the top.
12. Now, add your website or Instagram handle at the bottom (if you prefer)! Click in the bottom of your document where you want the words to go. It automatically creates a new Type Layer!
13. Click the Set Foreground Color box again to get the colors to pop up. Choose a color from your brand identity color palette (or black or white!). Click OK.
14. Begin typing your website url or Instagram handle. Select your text and adjust the font, style, size, paragraph orientation, etc in the toolbar along the top.
15. Now, to add your logo in the corner. Open your logo file in Photoshop. Have both the template and the Logo file next to each other in separate files. With the Move Tool selected, select the layer that the logo is on and physically drag it onto your Instagram image. The logo is now it's own layer in your layered Instagram template Photoshop file.
16. Now, save your file for Instagram. Save the original layered file as .psd file, then save it in a location you can remember! Turn off the layers in your Layers palette that you do not want to be seen in the final artwork. Do this by clicking the small eyeball tool to the left of each layer in your Layers palette. Then click File > Export > Save for Web.
17. Select the following details in the Save for Web screen:
PNG-8
Check Transparency
Check convert to sRGB
Image size: 1200 x 1200 px
Quality: Bicubic
18. Click Save. Save in a location where you can access it on your phone. Examples: Google Drive, Dropbox, etc.
OR, to export as a .png, click File > Export > Quick Export as .png. Be sure to edit or hide layers as needed. Then save to a specific folder to add to social. Tip: Include the month and/or day in the file name. Save in a location where you can access it on your phone.
19. Finally, click File > Save the template with your new art in the layered .psd file.
Need help with file types? Learn more about the fundamentals of Photoshop here. Or, download this simple cheat sheet all about different Photoshop file types.


